Eng | 中
FLASHFORGE
  • Home
  • Products
    • Adventurer 3
    • Adventurer 4
    • Creator Pro 2
    • Creator 3 Pro
    • Creator 4
    • Guider IIs
    • Guider 3
    • Guider 3 Plus
    • Foto 9.25
    • Foto 13.3
    • Hunter
    • WaxJet 400
  • Materials
  • Support
  • Blog
  • Contact Us
  • Home
  • Products
    • Adventurer 3
    • Adventurer 4
    • Creator Pro 2
    • Creator 3 Pro
    • Creator 4
    • Guider IIs
    • Guider 3
    • Guider 3 Plus
    • Foto 9.25
    • Foto 13.3
    • Hunter
    • WaxJet 400
  • Materials
  • Support
  • Blog
  • Contact Us

What is the wall function in the 3D slicing software?

22/9/2016

 
Picture
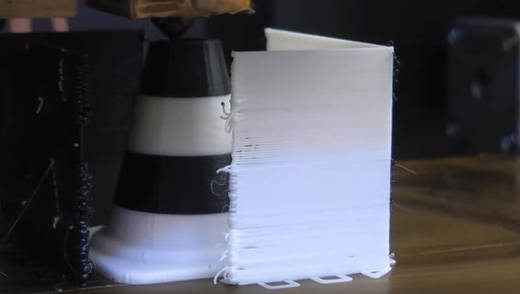
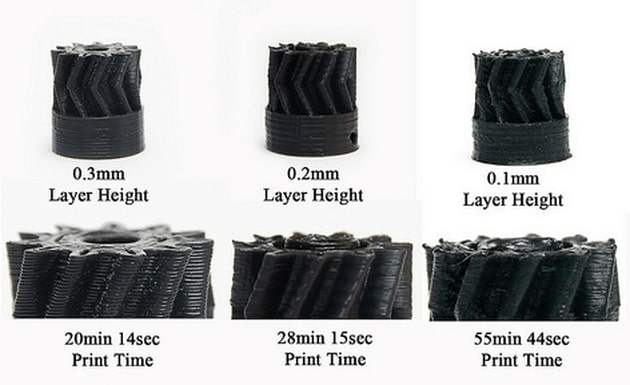
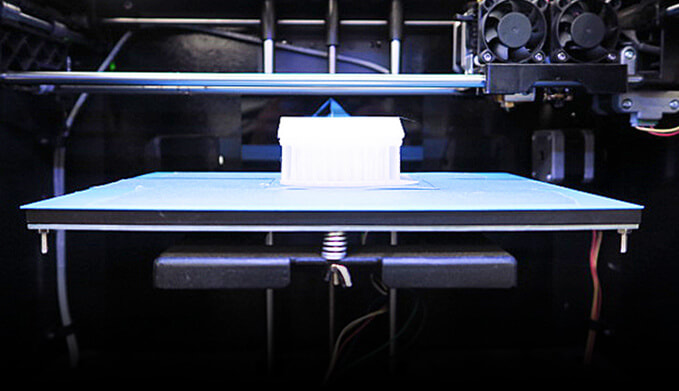
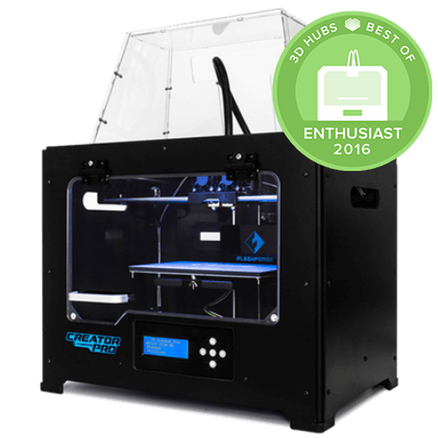
image credit: Steve Johnstone
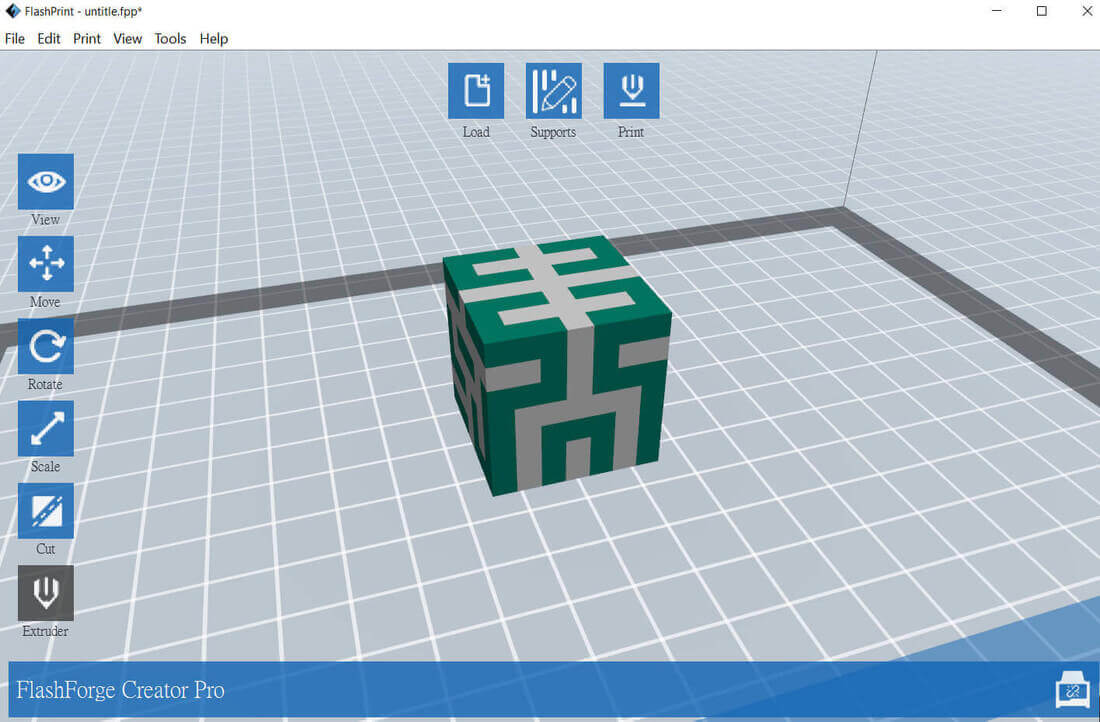
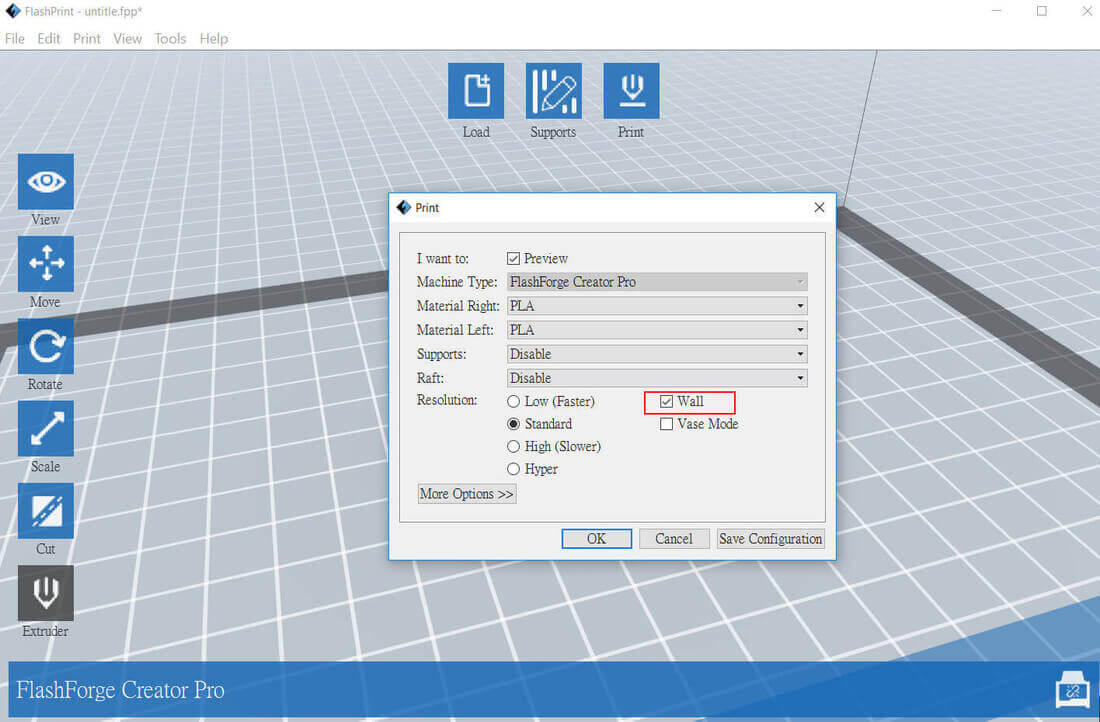
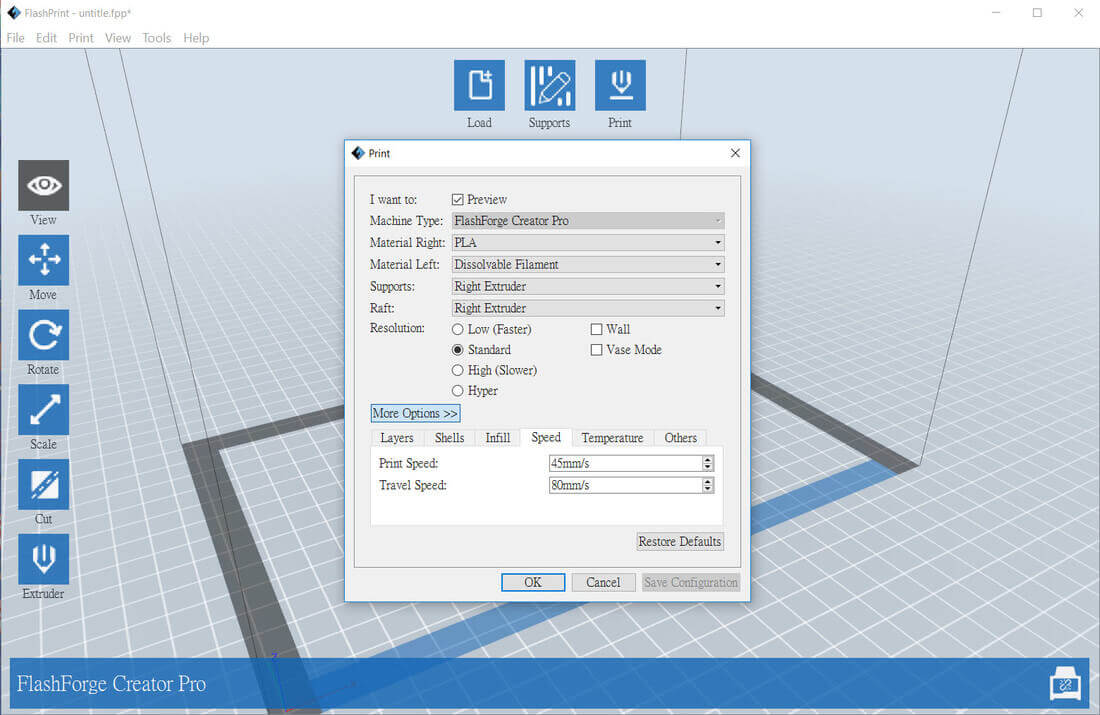
If you want to have a dual 3D print, there will be a wall(purge wall ) function for you to choose. The wall function will be used when you need to have a dual print, so what is the function of the wall?
If you activate the wall function, there will be a wall printed around  the 3d model as shown in the above picture. The reason to use wall function is to minimise the oozing issue.
When having dual 3D print, one nozzle will squeeze out plastic while another nozzle will stand by, but the one which is standing by continues in very hot status, so the plastic inside will be melted down and possibly result in oozing. If the wall function is activated and there is a wall surrounding the 3D model, the nozzle which has oozing can leave the melted plastic onto the wall when the nozzle passes through and touches the wall.
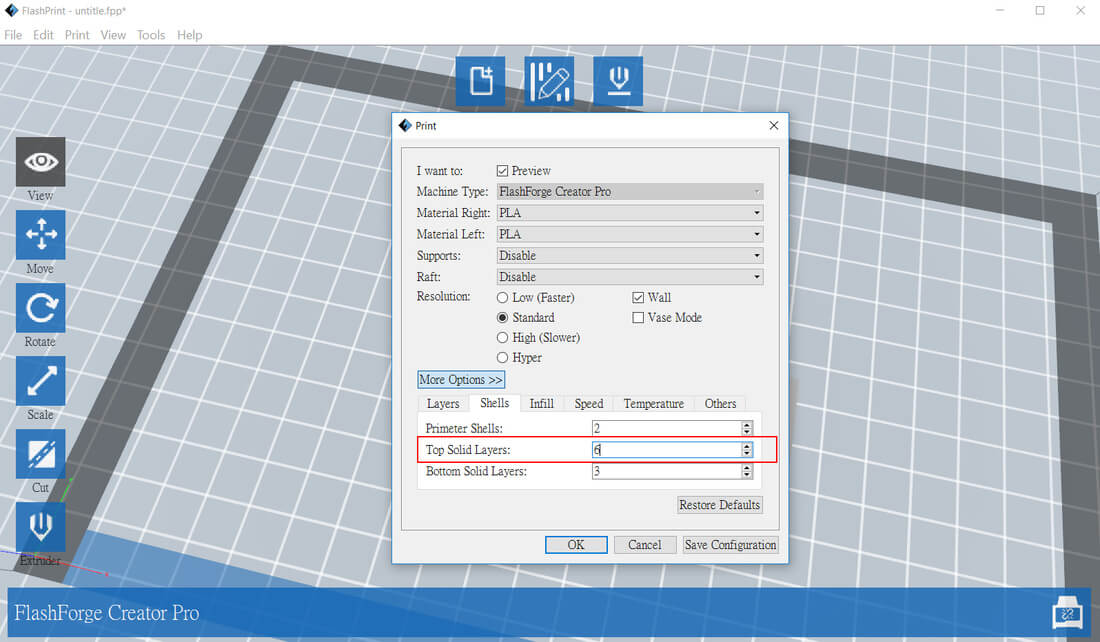
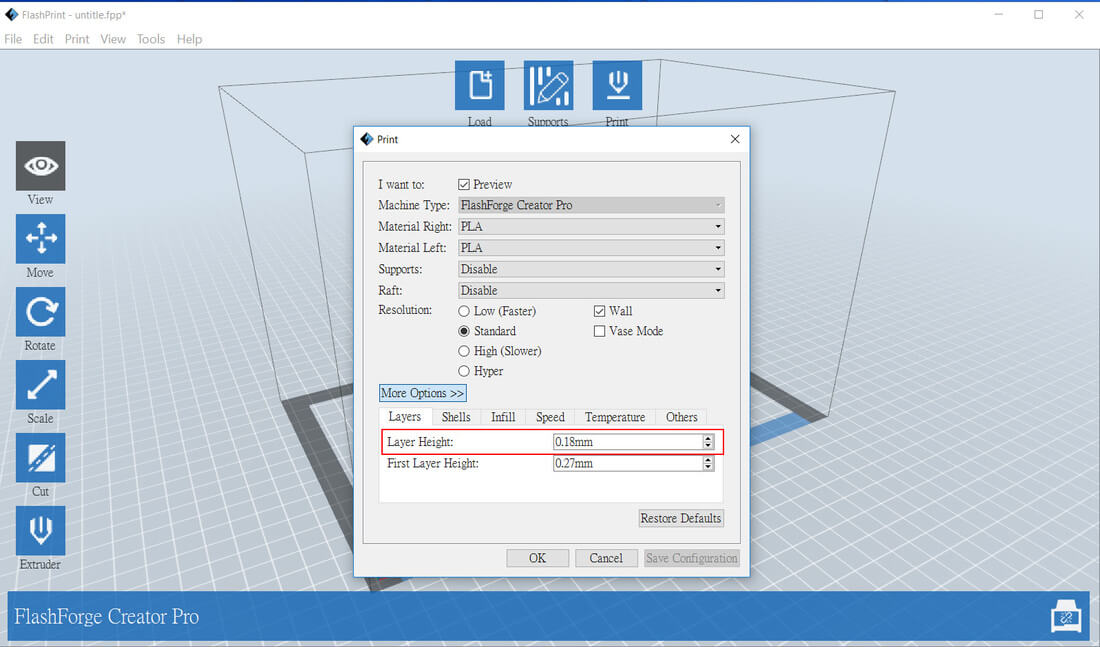
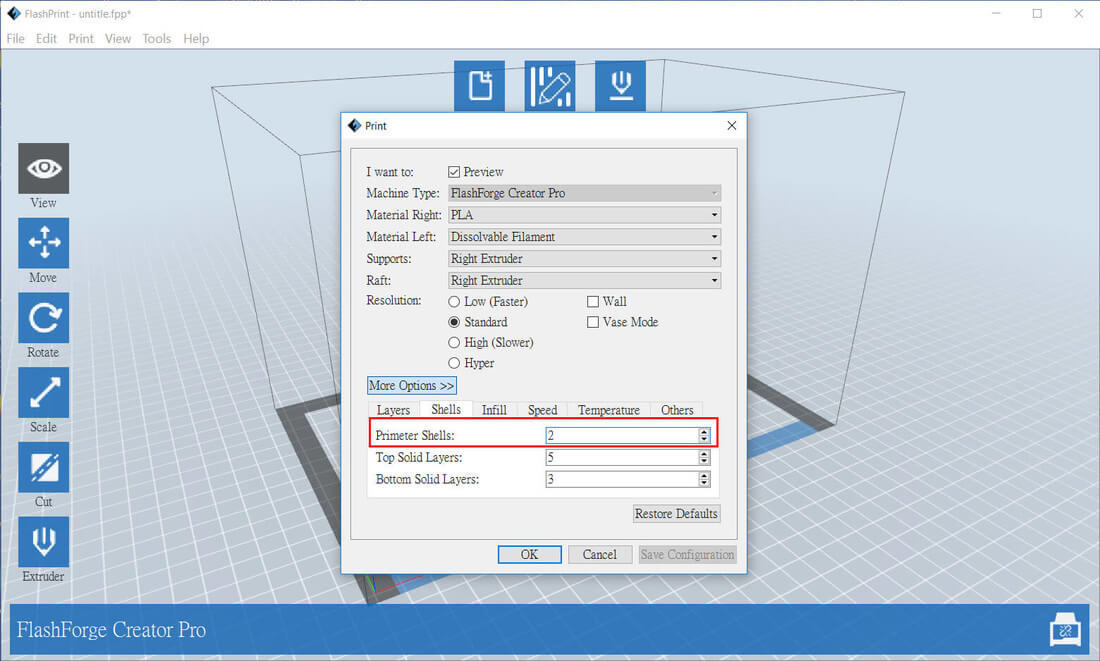
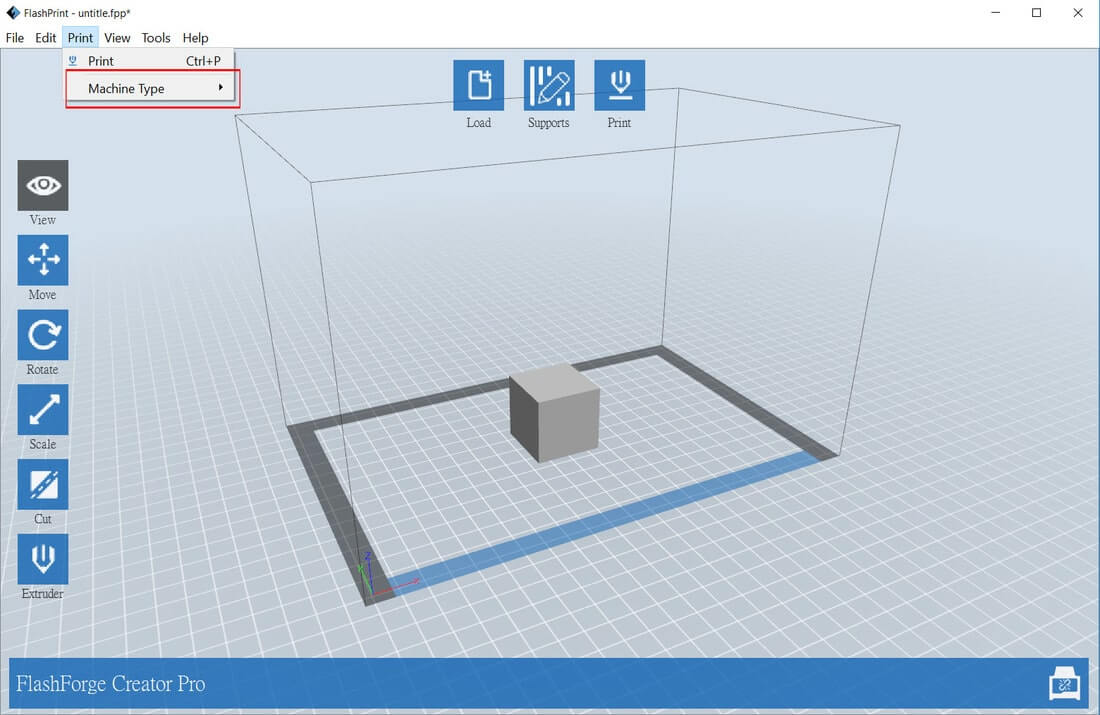
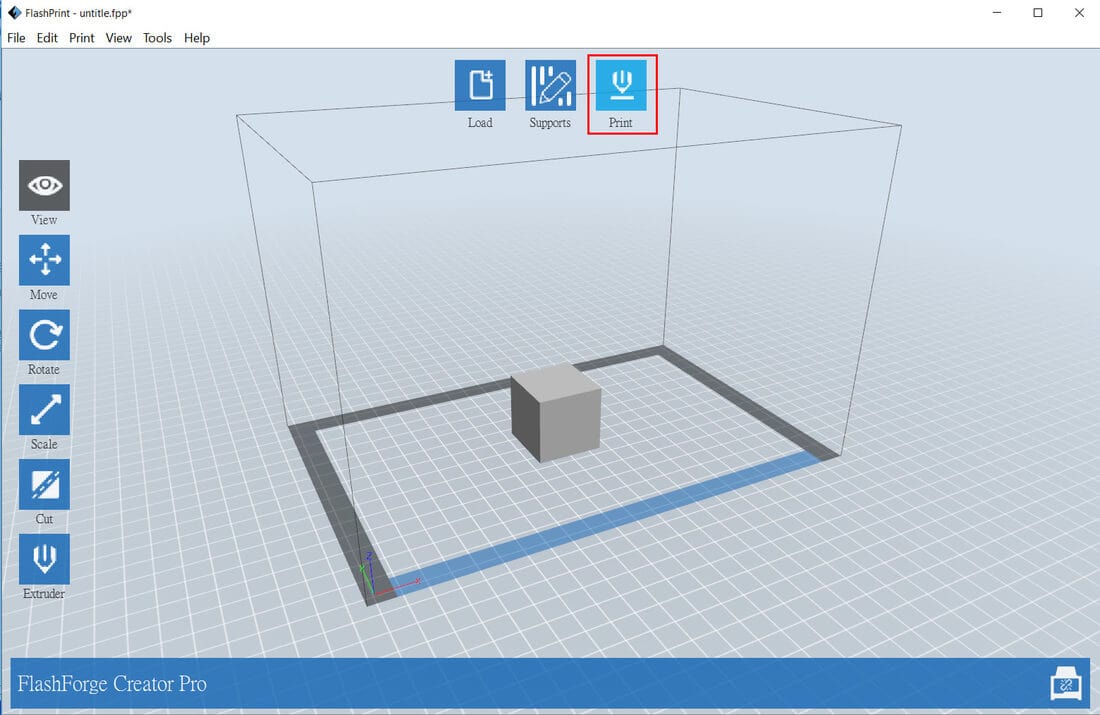
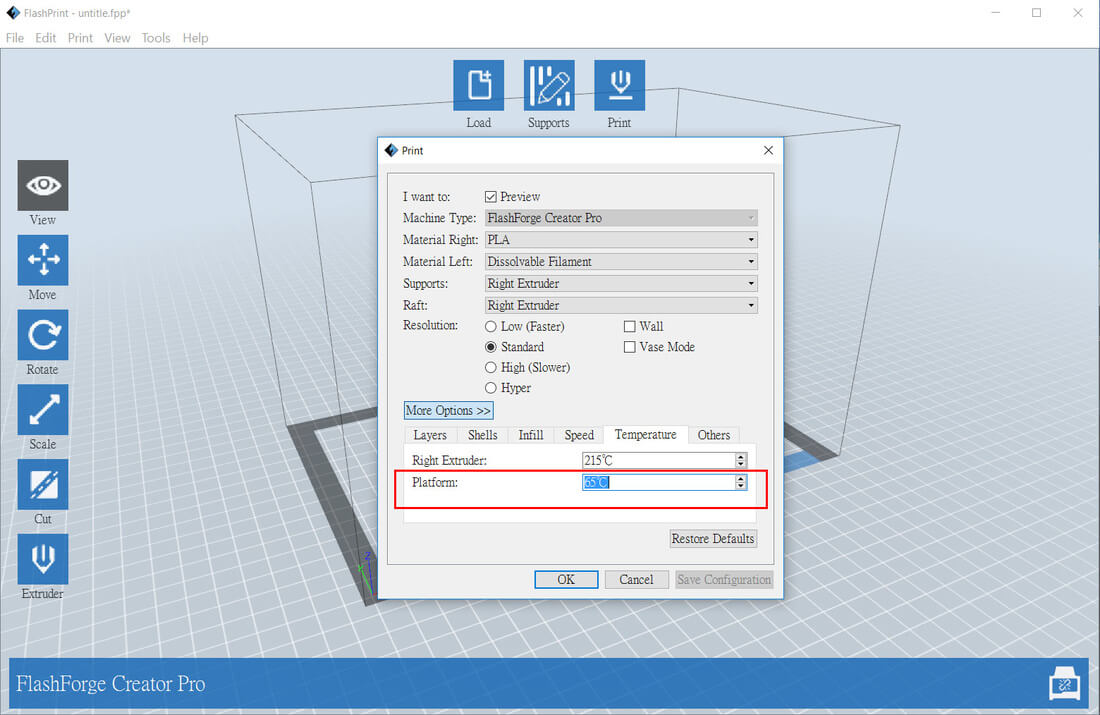
 The following is to demonstrate how to use the Flashforge's 3D slicing software Flashprint to set the wall:
Picture
Before setting the wall
What is the wall function in the 3D slicing software? Flashprint
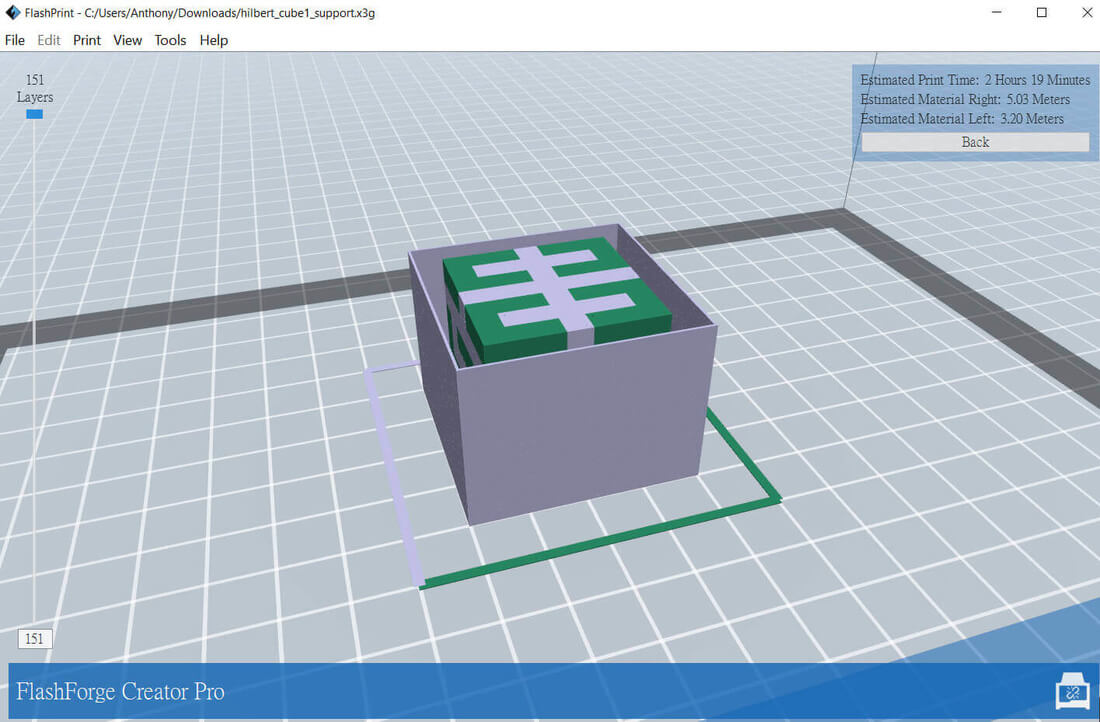
After setting the wall
Other Article
Picture


How to set the number of shells in the 3D printing software

What is top solid layer in the 3D slicing software?

17/9/2016

 
 In the 3D slicing software, Top Solid Layer setting can affect the quality and outlook of the 3D printout. Top solid layer setting is about how many solid layer will be printed onto the top of the model. As we mentioned in the previous articles before, when printing the inner structure of the 3D model, infill with chosen pattern and density will be used, and the top solid layer will be printed on the top of those infill. If the number of the top solid layer is not enough, the infill will be exposed and can be seen from outside and result in what we called pillowing phenomenon as shown below:
Picture
image credit: forum.seemecnc.com/
Although the lack of enough fill density will also lead to pillowing, how many top solid layers are enough to cover those infill to avoid the pillowing? ​General speaking, it is safer to set the number of top solid layers to be 6. However, the more top solid layers you set, the longer time the 3D printing will take.
​
The following is how to set the number of top solid layer in the 3D slicing software Flashprint:
Picture

What is the layer height in the 3D printing software

15/9/2016

 
Picture
image credit: 3d-printing-reviews.blogspot.hk
In the 3D slicing software, you will find there is a setting called ”layer height”. Layer height is used to determine the vertical resolution of a printout. The reason why the layer height is called vertical resolution is because the FDM 3d printer print the whole 3d model from the bottom to the top layer by layer. For example, if the layer height is set to be 0.2mm, it means that each layers will be printed in 2mm thickness. Therefore, the smaller the layer height, the higher quality the 3d model will be printed.
The following photo shows different effects when using different layer heights. You can see that the horizontal line pattern on the rightmost printout's surface is less obvious when using smaller layer height. On the other hand, using smaller layer height means that the time consumed to print the 3d model will be much longer.
Picture
image credit: theprintingbay.com
In general, layer height with 0.1mm to 0.15mm is considered to be high quality, while 0.2mm is regarded as medium quality. It is very easy to set the layer height in the 3d slicing software. Following example shows how to set the layer height in the Flashforge's 3d slicing software Flashprint:
Picture

How to set the number of shells in the 3D printing software

10/9/2016

 
Picture
image source: microfabricator
Last time we talked about how the fill density set in the 3D printing software will affect the hardness of a 3D print. This time we are going to talk about another setting  "the perimeter shell/Number of Shells", which can also affect the hardness of a printout.
Picture
image source: thingiverse
The more shells you set in the 3D printing software (3D slicing software), the harder the printout will have. In general, the number of shells has already been set to be 2 in default in the 3D printing software, and 2 shells is good enough. This is because besides setting the shells, you will at the same time set the fill density as well, therefore both fill density and number of shells will determine the hardness of a printout.
As the number of shell was set to be 2 in default in the 3D printing software, users normally don't need to do any adjustment on this setting. On the other hand, it is easy to adjust the number of shell in the 3D printing software. For example, in the Flashprint 3D printing software, users can simply type in the number of shell they want as shown below:
Picture

​Other Articles:
Picture


What is the function of the 3d printer heat bed?  ​

What is Infill in the 3D Printing Settings ?

7/9/2016

 
 What is Infill in the 3D Printing Settings ?
Infill is quite important in the 3D printing setting because it will affect the hardness of the 3D printout. When it comes to infill, there are fill (infill) density and fill pattern.
Fill density (Infill density) 
​Higher fill density will lead to the harder 3D printout
. If the infill density is 100%, the printout will a solid model. On the contrary, if the fill density is 0%, the printout will be hollow. In general, the density of the infill within 15% -30% is good enough to provide the printout with a reasonable hardness. On the other hand, the higher the infill density, the longer the printing time is required. 
Picture
image source: blog.teambudmen.com/


​Fill pattern (I
nfill pattern)
 
It is very easy to set the infill pattern in the 3D slicing software as well. Generally there are several options of the infill patterns such as hexagon, linear etc.. If you want to print faster, linear infill pattern is preferable and if you want to have a stronger printout, hexagon is better.
image source: blog.teambudmen.com/
image source:engineerdog.com


​To do the setting of infill pattern and infill density in the 3D slicing software 
Flashprint which was developed by Flashforge, just go to the "infill“ menu and type in the percentage of the infill and choose its pattern as shown below:

What is the function of the 3d printer heat bed?

3/9/2016

 
Picture
©3dprintingidiot
Heat bed is the 3D printer‘s build platform with heating function, but why do we need a heat bed? In the following situations, 3d printer heat bed will be required: ​
1. Heat bed will be needed if you want to 3D print with ABS material. This is because contraction rate of ABS is a bit high, which will lead to the warping issues during 3D printing. If the 3d printer's bed can be heated,  ABS will be able to attach on the heat bed more firmly with a lower chance of warping. 
2. Although it is not always necessary to print the PLA material with a 3d printer heat bed, if the shape of the 3D model is long, or the bottom surface of the 3D model which touches the bed is large, heat bed will be required. This is because long shape and big bottom surface can lead to warping issues easily.
The optimal temperature of the 3d printer heat bed depends on what material you are going to print with. For example, ABS requires 110°C for the heat bed while PLA generally requires 60°C. It is not difficulty to set the temperature of your 3d printer heat bed in the 3D slicing software. In general, the model of your 3D printer needs to be chosen first before doing the printing setting. If there is no heating function for the bed, heating setting will no be shown.  For example, in the Flashforge's 3D slicing software Flashprint, the users need to choose the type of their 3D printer by  choosing "Print" > " Machine Type" in the menu (Both Flashforge Dreamer and Creator Pro 3D Printers include heat bed).    ​
Picture
choose the model of your 3D printer
Picture
What is the function of the 3d printer heat bed? - Flashprint
set the build platform temperature

3D Print Speed Setting and Its influence

1/9/2016

 
Picture
© 3D Universe
​3d print speed is one of the most fundamental and important settings in a 3d slicing software. The 3d print speed will influence a lot of aspects such as printing quality. This time we are going to talk about how to set the 3d print speed and what is its influence.
​3d print speed setting controls the speed of the print head movement. In general, the normal 3d print speed is around 50 to 60mm/s. The print speed less than 50mm/s can be regarded as slow speed, while more than 60mm/s can be regarded as high speed. ​In most of the 3d slicing softwares, mm/s will be adopted as the print speed unit. For example, mm/s is used in the Flashprint 3d slicing software developed by Flashforge as shown below.
3D Print Speed Setting & Its influence - Flashprint

​The print speed we mentioned above of course is only as a reference. This is because the most suitable 3d print speed should be determined by the size, shape and complexity of a 3d model. A faster 3d printing speed may be applicable to a simple cube-like 3d model. However, if there is a detailed decoration on the cube-like 3d model, slower 3d print speed should be used in order to 3d print it with a stable and good quality. Therefore, users may need to test print with different speeds before they are ultimately able to get the quality 3d printed model. Normally, 50mm/s to 60mm/s is a good print speed to start with.
​The 3D print speed which is too fast or too slow does not only affect the 3d printing quality, but may also lead to the following 3d printing problems:
1. 3d printed model warping
2. Under or over extrusion
3. The printing material cannot firmly attach to the build plate when printing the first layer of the 3d model

​Therefore it is very important to get an optimized 3d print speed in order to get a good quality 3d printout.

 Creator Pro - One of the highest rated 3D printers in 3D Hubs in 2016

28/2/2016

 
Flashforge Creator Pro
Flashforge Creator Pro is one of the highest ranked 3D printers in 3D Hubs, which is the popular global online 3D printing community.  Creator Pro is voted as one of the best 3D printers in the Enthusiast category in 3D Hubs.
More review about Creator Pro from 3D hubs can be found here.


Simplify3D is compatible with Flashforge Dreamer and Creator Pro.

24/10/2015

 
Simplify3D slicing software
Simplify3D is a paid professional slicing softwareis. It is now compatible with Flashforge Dreamer and Creator Pro. This software provides a lot of configurations for 3D printers including Dreamer and Creator Pro.


Meet Flashforge at TCT Show 2015

20/8/2015

 
Flashforge at TCT Show 2015

​Flashforge will be at 2015 TCT Show from September 31 to October 1.  The booth will be at F33 in the National Exhibition Center, Birmingham. UK. Come and review our new 3D printers on the booth! 

<<Previous
Forward>>

    Blog

    Archives

    June 2022
    November 2016
    October 2016
    September 2016
    February 2016
    October 2015
    August 2015
    June 2015

    Categories

    All
    3D Slicing Software Settings

    RSS Feed

Products

Adventurer 3
​Adventurer 4
Creator Pro 2
​Creator 3
Creator 3 Pro
Creator 4​
Guider IIs
Foto 8.9
Foto 13.3
Hunter

​WaxJet 400

Support

Warranties
Course Booking

Flashforge

Contact Us
​Blog

English  中
 © COPYRIGHT 2022. ALL RIGHTS RESERVED.