3d print speed is one of the most fundamental and important settings in a 3d slicing software. The 3d print speed will influence a lot of aspects such as printing quality. This time we are going to talk about how to set the 3d print speed and what is its influence.
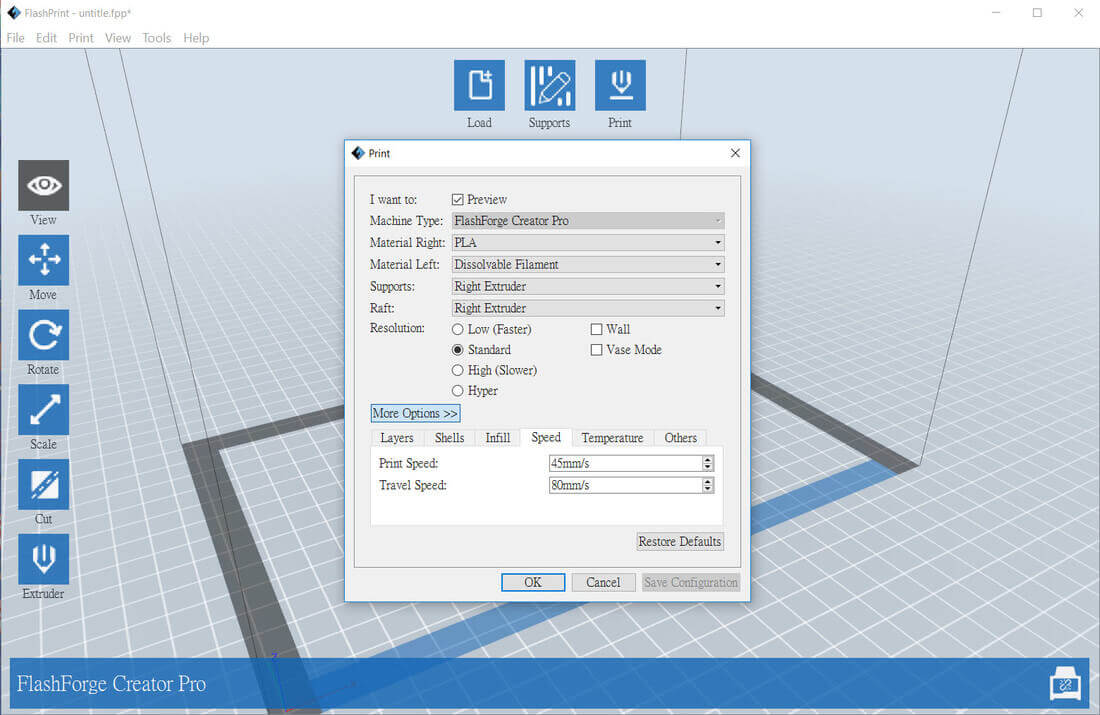
3d print speed setting controls the speed of the print head movement. In general, the normal 3d print speed is around 50 to 60mm/s. The print speed less than 50mm/s can be regarded as slow speed, while more than 60mm/s can be regarded as high speed. In most of the 3d slicing softwares, mm/s will be adopted as the print speed unit. For example, mm/s is used in the Flashprint 3d slicing software developed by Flashforge as shown below.
The print speed we mentioned above of course is only as a reference. This is because the most suitable 3d print speed should be determined by the size, shape and complexity of a 3d model. A faster 3d printing speed may be applicable to a simple cube-like 3d model. However, if there is a detailed decoration on the cube-like 3d model, slower 3d print speed should be used in order to 3d print it with a stable and good quality. Therefore, users may need to test print with different speeds before they are ultimately able to get the quality 3d printed model. Normally, 50mm/s to 60mm/s is a good print speed to start with.
The 3D print speed which is too fast or too slow does not only affect the 3d printing quality, but may also lead to the following 3d printing problems:
1. 3d printed model warping
2. Under or over extrusion
3. The printing material cannot firmly attach to the build plate when printing the first layer of the 3d model
Therefore it is very important to get an optimized 3d print speed in order to get a good quality 3d printout.
1. 3d printed model warping
2. Under or over extrusion
3. The printing material cannot firmly attach to the build plate when printing the first layer of the 3d model
Therefore it is very important to get an optimized 3d print speed in order to get a good quality 3d printout.


 RSS Feed